%20(1).png)

→ Spreading Gravel: Introduction & Uses
→ How to Prepare the Area Before Spreading
→ Methods for Spreading Gravel
→ Step-By-Step Gravel Spreading Process
→ Popular Stone Customers Spread for Driveways and Landscaping
→ How Much Gravel Do I Need? Coverage Formulas & Load Examples
Gravel can be used in a wide variety of landscaping tasks. Whether you’re using it as a decorative layer in a pathway or walkway, or as a strong, functional layer in a driveway, gravel can be helpful in many different contexts.
Let’s get into the proper steps to prepare your desired work area before spreading gravel.
Before you can start laying new gravel, you need to remove any grass, weeds, roots and any other vegetation. Of course, you’re also going to want to get rid of any other loose debris, or old gravel that you might be replacing.
You’re also going to need to shape the soil to allow rain and other liquids to flow away from your paths. If the ground is flat, it’ll pool and potentially erode the area or create puddles.
Be sure to use string or edging to outline the area in which you plan on spreading the gravel. This can help you plan and define the shape oof your path, driveway, or whatever else you may need the gravel for.
There are various methods you can use for spreading gravel.
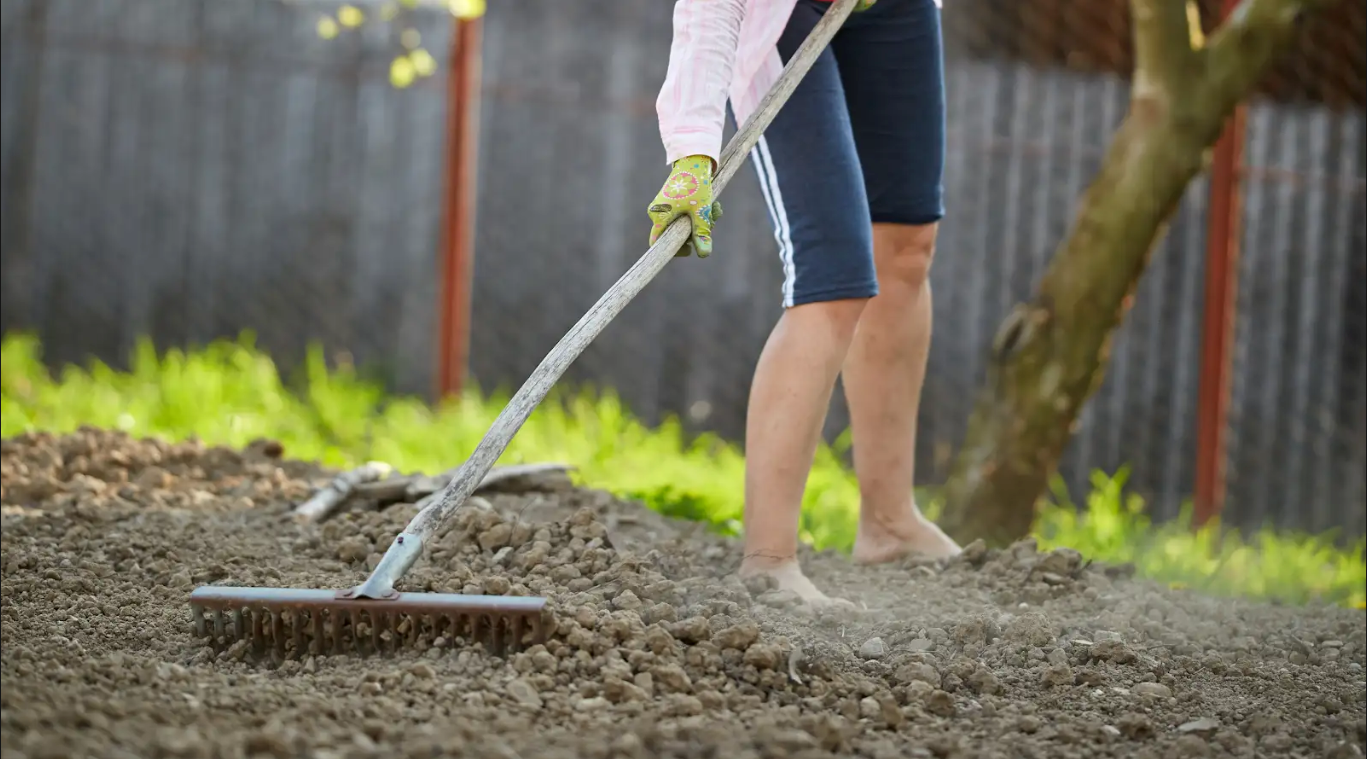
Spreading gravel by hand with a rake or shovel is best when you’re working in a small area. Use a shovel to scoop the gravel onto your desired spot and use a rake to spread it. You can also use a wheelbarrow to bring the gravel over to the work area from a pile.
For a mid-sized project, you can use a skid steer or a compact tractor. These machines can help you move around and spread large amounts of gravel but are compact enough to work in moderately sized areas.
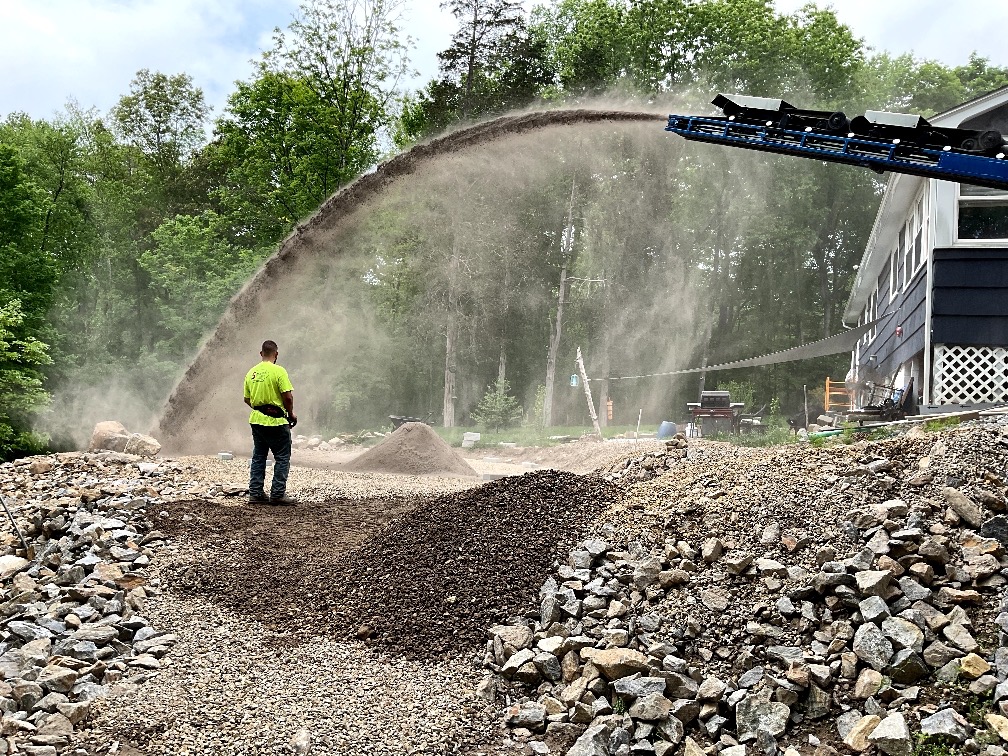
For large projects, you can enlist the help of stone spreading trucks. These trucks can help you move and spread even larger amounts of gravel, but they can really only be used on large worksites.
Now we can get into the process of spreading gravel.
Try to ensure that your gravel delivery location will be close to your work location to minimize trips between the two. If you have the work site prepped already you can unload your gravel directly into the worksite so you can spread it easily. Also, if the worksite is large, have it dropped off in multiple small piles across the site, rather than in one large pile.
Once you have your gravel where you want it, you’re going to want to use your desired method to spread the gravel evenly across the area. Try to make it a smooth, level layer.
Speaking of making it a smooth layer, you can do so by using a rake to move the gravel around evenly. You’re also going to want to feather the edges by gradually thinning out the gravel at the edges of your worksite. This will give it a tapered look instead of ending abruptly.
There are various popular stone materials that people tend to use for driveways and landscaping.
3/4" crushed stone is a great choice for many landscaping projects. It acts very well as a base layer due to its angular shape giving it great stability, and it drains and dries efficiently. This makes it strong enough to be used in driveways, pathways, and many other projects.

Road base mix is helpful as a base layer for many landscaping projects. It’s a strong compactable material that can be used in driveways, pathways, patios, and other high-traffic surfaces. Its ability to be compacted makes it very shift resistant too, further adding to its structural stability.
RCA is made from crushed waste concrete, and it can be used as a base, or as a decorative material in a variety of landscaping projects. It has the stability to handle heavy foot traffic and vehicles, but it also has the style to be used as decorative gravel. Since it’s made from recycled materials, it’s also an eco-friendly option.
Figuring out how much gravel you need can be daunting, but with a simple formula you can find out the answer within minutes. All you’ll need is the length, width, and height of your work space, multiply them together and you’ve got your cubic yards, which will tell how much material you’ll need. The formula looks like this: cu yds = length x width x height. To make the process even easier, and to see some example calculations, you can check out our project calculator.
There are a few common mistakes people tend to make when spreading gravel. Ignoring prep work can lead to uneven gravel surfaces, always prep the site before spreading gravel. Some people also use the wrong type of gravel. Be sure to stick to angular crushed stone for driveways or paths and use pea gravel for decoration. Not compacting the gravel enough can also lead to trouble. Loose gravel layers do not hold up well under feet or tires.
Gravel can be used in many different projects. Knowing how to spread it correctly can save you from a lot of headaches when it comes to landscaping. If you follow our steps above, you should be laying out gravel like a pro in no time. If you want some additional assistance feel free to contact Landscape Barn and we can see what we can do for you.
Take the guesswork out of your next project! Use our Project Calculator to quickly estimate the materials you need for your landscaping plans. Get started here with our Project Calculator.


Looking for landscaping stone for your next project, such as driveway, patio, or walkway renovation?
rEAD MOREWe’re here to help you bring your outdoor vision to life—reach out with any questions or to start your next project.
.svg)
.svg)
.webp)
.svg)
.svg)